Follow these instructions if you own a domain with Network Solutions.
1. Login to your Network Solutions account.
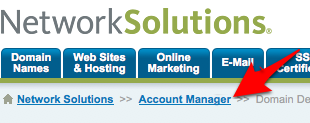
2. Click on “Account Manager”

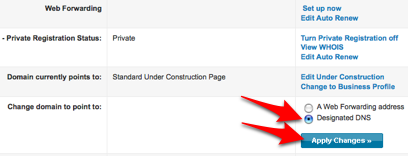
3. Scroll Down to the page and select the “Designated DNS” radio button and click the “Apply Changes” button

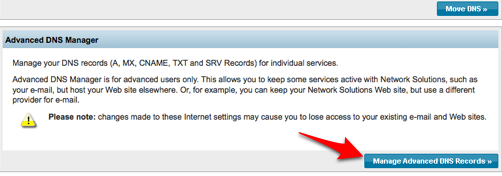
4. Scroll down the page and click the “Manage Advanced DNS Records” button

5. Click on “Add/Edit” under “Host Aliases (CNAME Records)”

6. Type in “www” for the alias, select the radio button next to “Other Host” and type in “stores.flyingcart.com” and click on the blue “Continue” button at the bottom.

7. Login to your Flying Cart store headquarters
8. Navigate to the Store -> Settings tab and locate the “Website Address” section on the page
9. Type in your domain name under “Use your own domain:”

10. Hit the “Update Settings” button towards the bottom.
11. Wait a full 24 hours
Tags: custom domain, customer support

This design is wicked! You obviously know how to keep a reader amused.
Between your wit and your videos, I was almost moved to start my own
blog (well, almost…HaHa!) Great job. I really enjoyed
what you had to say, and more than that, how you presented it.
Too cool!
An impressive share! I have just forwarded this onto a coworker who had been
conducting a little research on this. And
he actually bought me breakfast because I stumbled upon it for him.
.. lol. So let me reword this…. Thank YOU for
the meal!! But yeah, thanx for spending some time to discuss this topic here
on your website.