Tips for Creating an Online Store

Archive for the ‘Store Design’ Category

New Theme! Are You A Minimalist?

Friday, December 3rd, 2010

Simplicity is a major covenant in the Flying Cart philosophy. We aim to make our product the easiest ot use Online Storefront Solution available.

Now the same notion of simplicity has extended to our design offerings with our new Flying Cart theme, Minimalist. We keep ti barebones so nothing distracts your potential buyers from what’s most important – your products.

Check the theme out by going to the Design section of your HQ. Visit the Themes tab and scroll down to the bottom, then click Install.

Simple as that.

Add custom content to your department pages

Monday, June 29th, 2009

You can now add custom content to the top of your department pages.  Add an image or write some descriptive text to give your pages some personality.

Here’s an example using Hana Bay Coffee (hanabaycoffee.flyingcart.com). I added an image to illustrate the “Hawaii” concept on this page and I wrote a few sentences about the Hawaiian beans.

dept_description

Here’s how to do it:

1. Log in to your heaquarters and go to the Products > Departments page.

2. Click on the word “Description” next to the department name and an HTML editor will appear.

3. Enter your content into the editor. If you want to insert an image, you can use one of the images you uploaded on your custom CSS page or you can link to an image that you have hosted elsewhere (try <a href=”http://www.flickr.com” target=”new”>Flickr</a>).

4. When you are done, click the blue disk icon next to the department to save your changes.

5. Go to your store and check out the department page. How does it look?

dept_description2

Simple way to round image corners

Wednesday, June 24th, 2009

Rounded corners are everywhere on the web, but they can be a little tricky to make. I was excited to find the free tool called RoundPic (http://www.roundpic.com/) that makes it really easy to round the corners of any image without using Photoshop. All you have to do is go to the site, browse for your image file, and a new rounded image is created. Then you can download it to your computer.

Consider using rounded corners on product images in your Flying Cart store to give it a clean and modern look.  If you want to do it, I’d recommend you do all or none so your design is consistent. Here’s an example of an image I created with RoundPic:

Original Image

bracelet

Image with Rounded Corners

bracelet_round

Rounded Corners for Images

Store uses own website to sell products from Flying Cart account

Wednesday, June 3rd, 2009

Robeco Clarete of Pinoy Culture (www.pinoyculture.ca) came up with a way to use his own website to sell the products from his Flying Cart store.  That’s right – his own site hosted on his own server! He gets the flexibility of using his own site design, but also has all the benefits of using Flying Cart to manage his sales and market his products.

pinoy culture store screenshot

PinoyCulture.ca PreSchool department

pinoy culture screenshot

PinoyCulture.ca Shopping Cart

Really?

The design at the top and the sidebar are Robert’s own. The middle section of the screen contains the content of his Flying Cart store.

How does this work?

Robert’s solution is very clever and requires some technical knowledge to implement.  In a nutshell, he used the Flying Cart custom CSS feature to hide all the page elements other than the products. Then, he made a department navigation menu on his own site and linked to each department page in his Flying Cart store using the javascript “loadintoiFrame()” command. These links are targeted into an iframe in the center section of his site. This creates a seamless interface and most customers won’t have a clue that the ecommerce comes from a hosted solution.

The Flying Cart team is entirely impressed with this creative way to use the software.

Want a Store Makeover? *reminder*

Friday, February 6th, 2009

We will be picking a winner on Sunday night.  You can still apply by leaving a comment on this blog post.

Want a store makeover?

Monday, January 19th, 2009

I want to give one of our stores a store design makeover!

Here are the 2 requirements:

  • At least 7 products with 7 product pictures uploaded
  • About Us page filled out

You can apply in the store comments by leaving your store URL and reasons why you want a makeover.  Only apply if you think your store could use some help.

Here is what I am going to do:

  1. Add a logo
  2. Change the colors of your store
  3. Add some pictures to your about us page
  4. Use a sweet background image

Customer Pictures

Monday, November 24th, 2008

Last week I met Ted.  He started Powered Green.  You can buy a sticker for your laptop that goes towards buying a new wind turbine.  The wind turbine produces the amount of energy an average laptop needs in its life time.  Here is how it works.

Anyway… I bought one.  A day later Ted emails me asking if I can send him a picture of me and my powered by green laptop to post on their website.  Of course I was pumped and excited!  I sent him my picture and he posted it.

Rishi is Powered by Green!

I thought this was a great idea!  Post pictures of your customers using your product! This can be easily done with flickr or slide – Let me know if you are interested on a “How To” post about this.

Why I like it:

- The best customer testimonial you can get is a picture of your customer smiling and using your product

- It shows a sense of community

- This will get your customers involved and excited to be a part of your business.  Customers will be exited to show it off to their friends.

WYSIWYG HTML!

Tuesday, November 4th, 2008

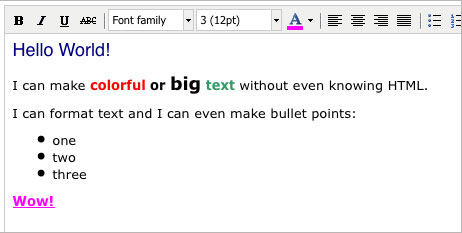
What You See Is What You Get. I just added a graphical HTML editor in the Flying Cart Headquarters so you can add style to your site without knowing any HTML.  Take a look for it on the pages where you edit your Homepage, About page, Return policy, and product descriptions, to name just a few.  You can change the font, size, and color of your text, add bullet points and images, and more.

The new editor is a free Open Source web plug-in called TinyMCE. It is so easy to use and useful, I can’t say enough good things about it.  Have fun.

TinyMCE HTML Editor

Now everyone, it’s election day so don’t forget to vote! Let’s bring in some positive change.

NOTES TO ADVANCED HTML USERS

1.  You can still write your own HTML by clicking on the “HTML” button on the toolbar and entering your code in the popup window.

2.  Any existing HTML tags (that you entered before this feature was available) that are visible in the editor window will display as raw HTML tags on your page if you save changes. TinyMCE will convert all HTML tags to HTML escape characters. This is probably not what you want. To avoid this problem, you can either copy and paste your exising code into the HTML code window, or you can redo your formatting using the graphical editor.