![]()
You own a domain name that you bought from GoDaddy! Nice job. Custom domain names are fun.
Here is a step by step video tutorial on how to setup your custom domain:
You can also follow our screen shots and instructions below or watch this video to set it up with your Flying Cart store.
1. Log into your Godaddy.com account. Click on Domains and then Domain Management.

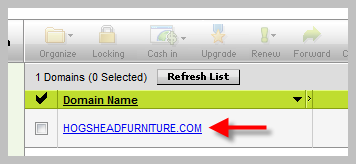
2. Click on the domain you would like to use for your Flying Cart store.
3. Click on Launch underDNS Control.

4. Click the edit button next to www under CNAME. Click Ok when it asks if you are sure you want to modify your CNAME Alias.

5. Enter www for the Alias Name and stores.flyingcart.com for the Points to Host Name. Hit Ok.

6. Click on the Domain tab at the top to return back to the Domains details page.

7. Click on the forward ![]() button and enter in your domain name with http://www. before it. For example if your domain name is MyCoolStore.com then type in http://www.myCoolStore.com. Click the check box next to Enable Forwarding, click the radio button next to 301 Moved Permanently, and hit Ok.
button and enter in your domain name with http://www. before it. For example if your domain name is MyCoolStore.com then type in http://www.myCoolStore.com. Click the check box next to Enable Forwarding, click the radio button next to 301 Moved Permanently, and hit Ok.
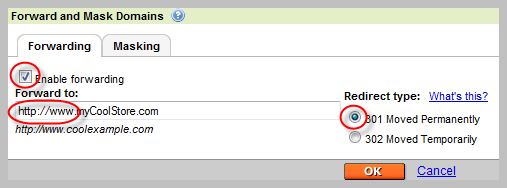
This step allows your customers to be able to type in http://www.myCoolStore.com or http://mycoolstore.com and get to your store.
8. Login to your Flying Cart store headquarters
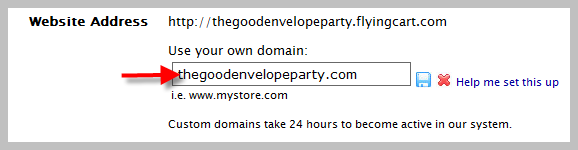
9. Navigate to the Store -> Settings tab and locate the “Website Address” section on the page
10. Type in your domain name under “Use your own domain:”
11. Hit the “Update Settings” button towards the bottom.
12. Wait a full 24 hours
Tags: custom domain, GoDaddy
Set me up
Set me up with my own web domain, please. I followed all the instructions and I complete the registration more than 24hours ago…. what happened?
thank you
THANK YOU!
Looks like its working great: http://www.oldischic.com
What is the “Nameservers” on GoDaddy supposed to be set to?
Parked nameservers (Park my domains here.)
Hosting nameservers (Host my domains here.)
Custom nameservers (I host my domains elsewhere.)
I have tried to get my cart up, but I can’t figure SOMETHING out, though thank you for helping me with getting the hosting off 1&1 and pointing GoDaddy in the general right direction.
I submit my URL to FlyingCart and each time I log in to check my settings, it’s not been saved from the settings. I save the URL, scroll down and it shows, log out, log back in, and it’s gone.
Hi Dawn,
There is no need to modify your nameservers.
You are suppose to hit the Disk icon next to the domain to save it in your settings. I went ahead and did that for you.
If you follow the steps above on GoDaddy your URL should be up and running in the next 24 hours.
Please let me know if that isn’t the case.
Rishi
Does this work with subfolders or subdomains? For example, could it work with store.mydomain.com? or mydomain.com/store ?
We’d like to keep our splash page on our site if possible.
Thanks.
Humble Hive – Yes you can do that.
hi Rishi,
I purchased a go daddy domain, two days ago and followed the instructions correctly, it does not seem to be working when I type http://www.southernbazzarandbridal.com, Just comes up with a blank page,
Where have I gone wrong?
Cheryle – It looks like you didn’t follow steps #4 and #5. I went ahead and made those changes for you. You should be set in 24 hours
Go Daddy is asking me for Flying Cart’s 2 server names. Could you please provide them?
Thank you
Hey Melitza – For Godaddy Domains. Follow our instructions here: http://flyingcart.com/blog/godaddy-custom-domain-instructions/
You need to update the Godaddy instructions a little bit. They aren’t representative of the actual process at all.
Game Servers|Server Games|Game Servage|Servage…
[...]GoDaddy Custom Domain Instructions | Tips for Creating an Online Store[...]…
find an electrician