Tips for Creating an Online Store

Posts Tagged ‘css’

CSS Tips: Bigger Thumbnails

Wednesday, July 21st, 2010

Flying Cart comes with some pretty great built-in themes and gives you the ability to customize your store even further with custom CSS. If you’ve never worked with HTML or CSS making changes may seem daunting at first. But if you take things one step at a time and save your progress you can learn how to make a lot of changes yourself.

To get started, here’s a tip on changing the appearance of your featured products.

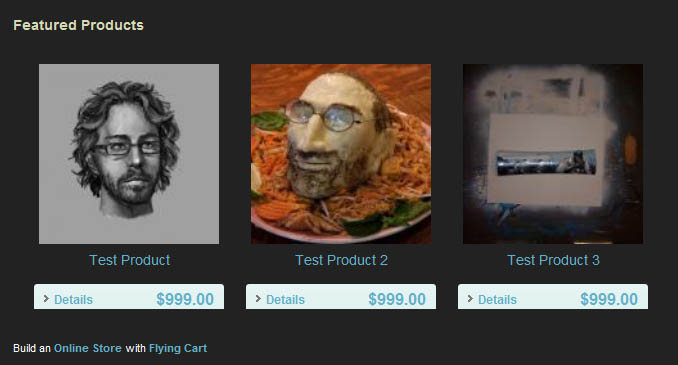
original-thumbnails

Starting with the Tuxedo theme you’ll notice that all of your product thumbnails are in a white box with white space around your thumbnails.

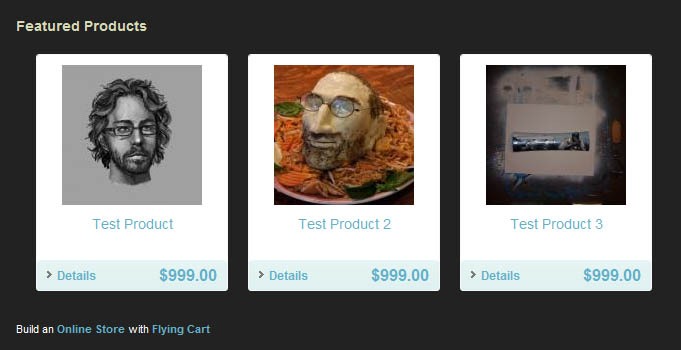
updated-thumbnails

But what if you wanted to remove the box and make your thumbnails larger? It’s a simple CSS fix.

Read more after the jump for details on how to change your thumbnails. Read more…
(more…)

Custom CSS just got easier

Wednesday, August 5th, 2009

Our custom CSS now has helpful comments and is structured it to be easier to read.  We also added a nifty “Fullscreen” button so you can use your entire computer screen to work on your CSS.

fullscreen

Store uses own website to sell products from Flying Cart account

Wednesday, June 3rd, 2009

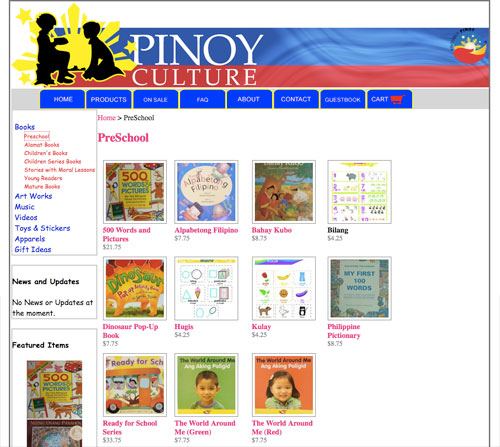
Robeco Clarete of Pinoy Culture (www.pinoyculture.ca) came up with a way to use his own website to sell the products from his Flying Cart store.  That’s right – his own site hosted on his own server! He gets the flexibility of using his own site design, but also has all the benefits of using Flying Cart to manage his sales and market his products.

pinoy culture store screenshot

PinoyCulture.ca PreSchool department

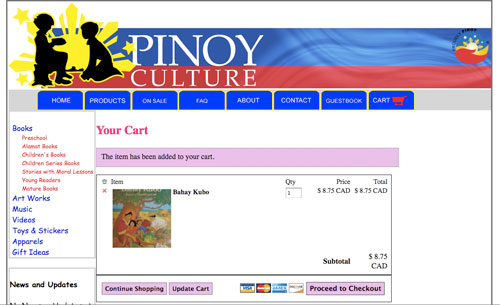
pinoy culture screenshot

PinoyCulture.ca Shopping Cart

Really?

The design at the top and the sidebar are Robert’s own. The middle section of the screen contains the content of his Flying Cart store.

How does this work?

Robert’s solution is very clever and requires some technical knowledge to implement.  In a nutshell, he used the Flying Cart custom CSS feature to hide all the page elements other than the products. Then, he made a department navigation menu on his own site and linked to each department page in his Flying Cart store using the javascript “loadintoiFrame()” command. These links are targeted into an iframe in the center section of his site. This creates a seamless interface and most customers won’t have a clue that the ecommerce comes from a hosted solution.

The Flying Cart team is entirely impressed with this creative way to use the software.

CSS Reference Guide

Friday, December 28th, 2007

This is a detailed guide to all the CSS tags used by Flying Cart.

Div Tags: Layout
The DIV tags are used for page layout. They are on every page of the store unless otherwise noted. You can modify the default CSS to dramatically change your store layout.
div#container
A container surrounding the header content, the department menu, the main content, and the footer of the page.

div#header
Formatting for the header if the logo is being displayed as text.

div#header_with_logo
Formatting for the header if a logo image is used.

div#store_name_with_logo
Formatting for the store name if a logo image is used. (See class .header_text for a store name displayed in text.)

div#top_menu
Formatting for the top menu.

div#wrapper
A container surrounding the department menu.

div#menu
A container surrounding the department menu items.

div#content
A container surrounding the inner content of the page.

div#breadcrumb
Formatting for the breadcrumb navigation links. Located on all pages of the store except the homepage.

div#footer
A container surrounding the footer content.

The heirarchy of DIV tags looks like this:

HTML Tags: Formatting

The following standard HTML tags are used within the store and you may choose to style them.

body, a, table, tr, td, h1, h2, h3, p, form

Class Tags: Boxes, Navigation, Text
These classes are used in the inner content of the store pages.

.header_text
The store name if it is being displayed as text

.small_text
The smallest font option.

.medium_text
A medium size font option.

.menu_item_wrapper, .menu_item
The formatting and layout for department names.

.message, .error
The text and box for successful and error feedback to user actions.

.network_box
The region containing the list of the social network connections. Located on the homepage.

.connection
The region containing each social network connection

.product_box
The region containing each product thumbnail image, title, and price. Located on the homepage for Featured Items and on the Department pages

a .product_title
The link text for the title of a product when it is displayed inside a .product_box.

.product_price
The text for the price of a product when it is displayed inside a .product_box.

.product_title_detail
The text for the price of a product when it is displayed. Located on the product detail page.

.addtocart_box
The region showing the add to cart options. Located on the product detail page.

.addtocart_box_head
The top row of the add to cart options. Located on the product detail page.

.cart_box
The region containing the items in the shopping cart. Located on the Cart page.

.cart_box_head
The top row of the table containing the items in the shopping cart. Located on the Cart page.

.cart_box_item
A single row per item in the shopping cart. Located on the Cart page.

.btn
A standard button. Located on the product detail page, the Cart, the Email-A-Friend page.

.btn_sub
A secondary button. Should be smaller or less prominent than the .btn class. Located on the Cart page.

.btn_pay
The button users click to go to PayPal and pay by credit card. Should be larger or more prominent than the .btn class. Located on the Cart page.

The following screenshots show exactly where the classes are used. Class names are indicated in bold black text.

Screenshot 1

Product detail page

Screenshot 2

Cart page

Table ID Additions – Added June 2008

There are now “id” fields assigned to all of the tables on pages within the stores so you can further customize your layout. Here is a list of all the id names. View the page source code within your store to see what goes where. The names explain themselves.

saleContentTable, saleContentTableRow, saleContentTableCell

productsContentTable, productsContentTableRow, productsContentTableCell

homeContentTable, homeContentTableRow, homeContentTableCell

featuredItemTable, featuredItemTableRow, featuredItemTableCell

networkBoxTable, networkBoxTableRow, networkBoxTableCell

emailAFriendTable, emailAFriendTableRow, emailAFriendTableCell

detailContentTable,detailContentTableRow, detailContentTableCell

detailImageContentTable,detailImageContentTableRow, detailImageContentTableCell

cartContentTable, cartContentTableRow, cartContentTableCell

contactBoxTable, contactBoxTableRow, contactBoxTableCell
How do I use customized CSS?

Friday, December 28th, 2007

You can use our custom CSS feature to create a unique design for your store. This document explains how to install a custom CSS file and how to upload images to use with your CSS.

The Learning Curve
Developing with CSS has a significant learning curve. New users should do some reading and go through an online tutorial before attempting anything. Users with basic
CSS knowledge should experiment with modifying the default CSS provided in the Headquarters. Intermediate and advanced users should be comfortable using our CSS reference to create complex new designs and layouts.

If you are having trouble getting your CSS to look right, there are lots of online reference materials.

Updating a CSS File

  1. In your store Headquarters, go to the Store > Custom CSS tab.
  2. Check the box to “Use custom CSS as defined below”.
  3. The default CSS that appears in the editing window is the CSS used in our Standard template. You can begin editing from there, or you can paste in your own file.
  4. Click “Update CSS” to save your changes.
  5. View your store to see the new design in place. You may have to reload the page and/or press CTRL-F5 (in Windows) to see the changes.

Uploading Images to Use with your CSS

You may be interested in using background images, button images, or other types of images with your CSS file. We make it easy and let you host these images on our servers.

  1. In your store Headquarters, go to the Store > CSS Images tab.
  2. To upload an image, click on the Browse button and find the image that you would like to upload.
  3. Click Upload to upload the image.

All the images that you upload will be accessible in the directory http://yourstorename.flyingcart.com/mytemplates/images, with the original filename of the file that you uploaded. For relative links, you should use mytemplates/images/ as the relative path.

For example, if you have an image called myimage.jpg that you want to set as a background, you would use the following CSS in the body tag: background-image: url(“images/myimage.jpg”).

Tips

Make sure you check your site in different browsers. Some CSS tags look very different in different browsers, and some are not universally supported. Invalid CSS may cause your customers difficulty using the site. We recommend that you check your site in Internet Explorer 6 and 7, Firefox, Safari, and on a Mac and PC to make sure it looks like you expect.