Tips for Creating an Online Store

Archive for the ‘Help & Support’ Category

CSS Tips: Bigger Thumbnails

Wednesday, July 21st, 2010

Flying Cart comes with some pretty great built-in themes and gives you the ability to customize your store even further with custom CSS. If you’ve never worked with HTML or CSS making changes may seem daunting at first. But if you take things one step at a time and save your progress you can learn how to make a lot of changes yourself.

To get started, here’s a tip on changing the appearance of your featured products.

original-thumbnails

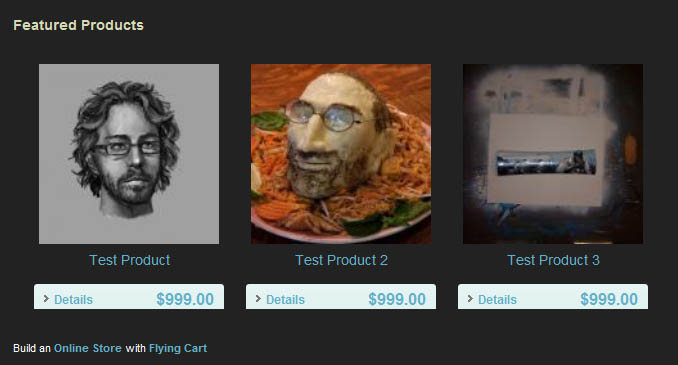
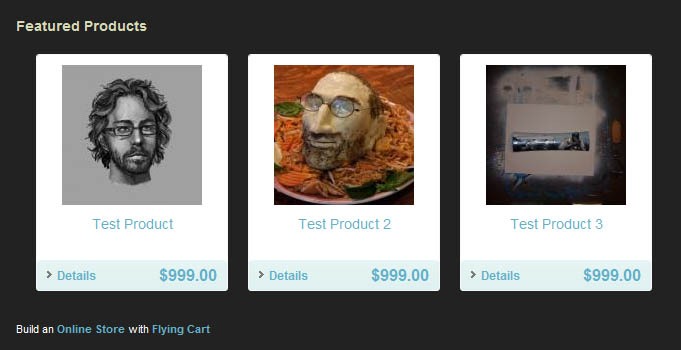
Starting with the Tuxedo theme you’ll notice that all of your product thumbnails are in a white box with white space around your thumbnails.

updated-thumbnails

But what if you wanted to remove the box and make your thumbnails larger? It’s a simple CSS fix.

Read more after the jump for details on how to change your thumbnails. Read more…
(more…)

JFKW Wedding & Birthday Invitations & Gifts

Monday, June 7th, 2010
Image of Wedding Card
Wedding Card
$35.00

Image of Anniversary Card-Book
Anniversary Card-Book
$35.00

Yeah, it’s the thought that counts, but not all thoughts are created equal. Flowers whither and cards get buried in junk drawers. But JFKW Wedding & Birthday Invitations & Gifts combines these simple nice gestures into a stunning gift idea they call Card-Books. These handmade, heartfelt gifts earn a spot on the mantle (rather than the hearth) and will be remembered well past the special occasion they honor. Ideal for weddings, thank yous, birthdays, anniversaries or any special day worth remembering. Made using beautiful dried and fabric flowers and adorned with satin ribbons and lovely detailing, each book stands as a unique peice of artwork.

How to integrate your UPS account with PayPal

Wednesday, February 24th, 2010

If you want to use your UPS settings to handle your shipping you can easily override the Flying Cart shipping settings and use them.  Here is how you can setup PayPal to use your UPS settings.

1.Login to your PayPal account and click on “Profile” -> “More Options”

2. Click on”Shipping Preferences”

3. Click on “Add new or existing UPS account”

How to give free shipping on big orders

Wednesday, February 17th, 2010

Here is how you can reward customers with free shipping if they order a lot of stuff.  I will explain with an example:

Our buddy Robert wants to give free shipping to customers that order $50 or more.  Here is how he would setup his shipping rates:

Notice how the rate applied between $50 – $100,000 is $0.00.  Make sure to remind them on your store homepage :)

1 and 1 Custom Domain Instructions

Friday, February 12th, 2010

1. Login to you 1 and 1 account and click on “Administration”.

2. Click on “Manage Domains”.

3. Check the box next to the domain you want to setup.

4. Select “Edit DNS Settings” under the “DNS” drop down

5. Select the “CNAME” option, enter in “stores.flyingcart.com” next to the Alias, click the checkbox at the bottom, and click “Ok” at the bottom to save.

6. Login to your Flying Cart store headquarters

7. Navigate to the Store -> Settings tab and locate the “Website Address” section on the page

8. Type in your domain name under “Use your own domain:”

Enter Website Address

9. Hit the “Update Settings” button towards the bottom.

Hey Folks, Update your Profile Pic!

Thursday, February 11th, 2010

Just click the “edit profile” link on your dashboard!

How do I setup shipping?

Thursday, February 11th, 2010

1. Login to your store Headquarters and navigate to Store -> Shipping

2. Determine if you are going to charge based on weight or price and click the save icon.  If you choose weight you will need to add weight values to each product.  In this example we will choose price (weight works the exact same way).

3. Pick a shipping location and click the “+” icon to add it.  This is what your shipping values will be for that location.  In this example I picked “United States”.

4. Enter in what shipping rates you would like to apply per price range and click the save icon button.  For example if you want to charge $5 shipping if the total cost of the purchase is between $0 – $20 then the range would be from $0-$20 and the rate would be $5.00.

5. Enter in the next shipping range and click the “+” button.  In this example I want to charge $8.00 shipping if the total cart value is between $20.01 – $100.00.

6. Keep adding shipping ranges just like in step #5 until you are satisfied.  If the shipping amount exceeds any shipping range that you haven’t specified then by default the highest range amount will be applied.  For example in the example above if a customer has a total of $150.00 then an $8.00 shipping charge will apply.

7. Select another country to specify shipping ranges to and click the “+” button.  In this example I’m going to pick Italy.

8. Repeat steps #4 and #5 for the new location

9. If you want to ship to any location pick the location “Everywhere”.  The “Everywhere” location will be applied to any location you haven’t specified.  For example if your specify shipping ranges for United States, Italy, and Everywhere and a customer checkouts out from India then the “Everywhere” shipping range will be applied.  If the customer checks out from United States the United States shipping ranges will apply.
How do I send out coupons to my fans?

Wednesday, December 9th, 2009

Tracey of It Girl Nail Decals just asked “How do I send out coupons to my fans?”

Thanks for the great question Tracey!  Here is how you do it.

Create a Coupon

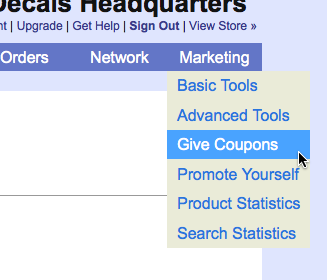
1. Going to the “Marketing” -> “Give Coupons” section

give-coupons

2. Pick a Coupon type “Percentage Off” or “Free Shipping”.  In this example we are going to do a “Percentage Off” coupon for 10% if they type in “Awesome” and we are going to a make it public (public coupons get displayed off our homepage).  Hit the “Save” button to make your coupon active!

create-coupon

Send a Newsletter

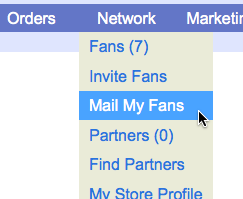
3. Go to “Network” -> “Mail My Fans”

mail-my-fans

4. Enter in a subject, pick a greeting, and send them a message.  Make sure the message tells your fans about your coupon!

newsletter

Click on the “Mail My Fans” button at the bottom and your coupon will be sent to all your fans!

Is there a way to duplicate an item I have already set up?

Monday, November 30th, 2009

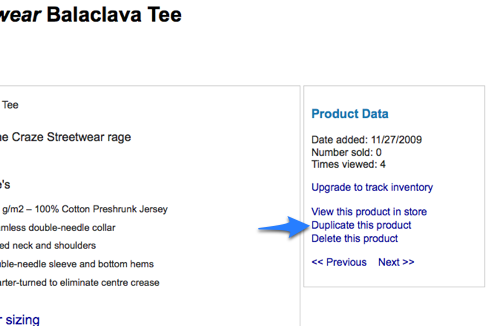
Yes you can easily duplicate products.  If you are listing multiple products that are pretty similar use our Duplicate button.

When you click on “Duplicate this product” a new product is added with the exact the same Title, Description, and Images added in.  At this point you can easily make a few edits to the product.

duplicate-product

How to Add and Use Sizes

Thursday, November 12th, 2009

Adding Sizes
1. Login into your store headquarters
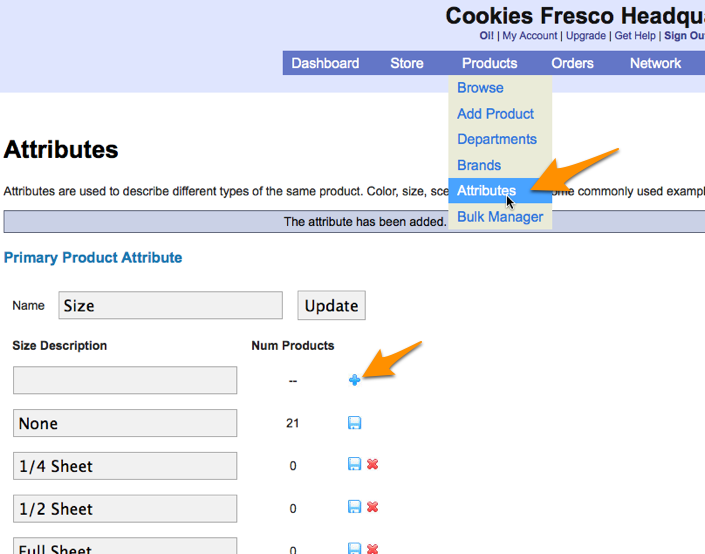
2. Going to the Products -> Attributes section
3. Enter in the size you wish to add and then the blue “+” symbol next to it

adding-sizes

Using Sizes

Once you have added all the possible sizes in you will need to add them as options in each product.  You can do this by

1. Login into your store headquarters
2. Go to one of your products by clicking on “Products” in the main navigation
3. Click on the product you wish to edit
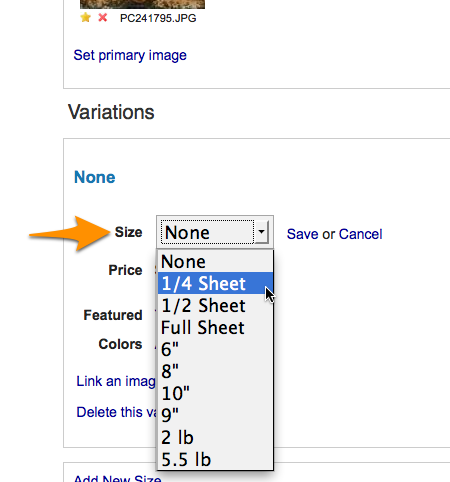
4. Scroll down and click on “None” next to size. (None is the default size) Pick the size that is appropriate for the product.

picking-a-size

5. Click “Save”

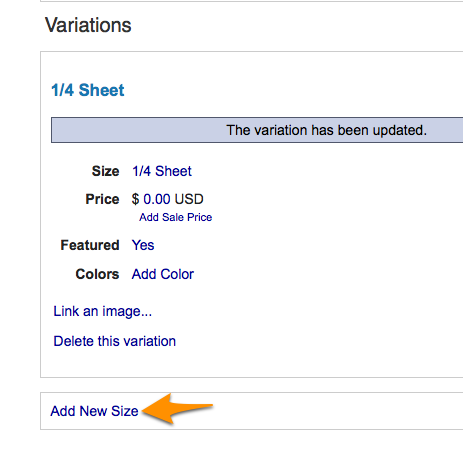
6. To add a new size click on “Add New Size” and repeat the process.

add-new-size